How to Set Up Social Sharing Buttons on Your WordPress Blog With Jetpack
by Andrew Urevig on
 Blogging thrives on interaction, which is why you should offer a few different ways for readers to talk to you.
Social media is a large chunk of the pie when it comes to promoting your website; especially with a blog.
That’s why you need to give your visitors an easy way to share your content. Jetpack, our favorite super-plugin, lets you do that. (See this post for a speedy guide on installing and activating Jetpack.)
In this tutorial, I will explain what the sharing module does, how to activate it and how to configure it.
What the Jetpack Sharing Module Does
The Sharing module will insert a selection of sharing buttons at the bottom of every post you publish, like this:

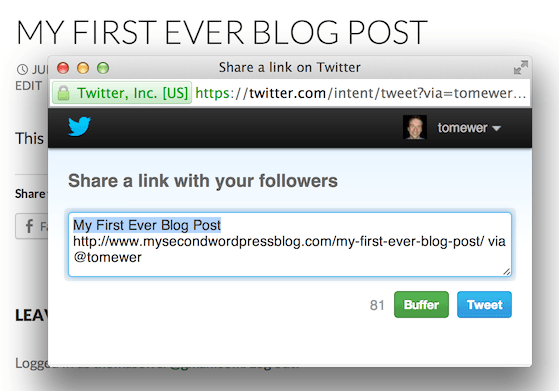
When you click on a button, a sharing window will pop up:
How to Activate the Jetpack Sharing Module
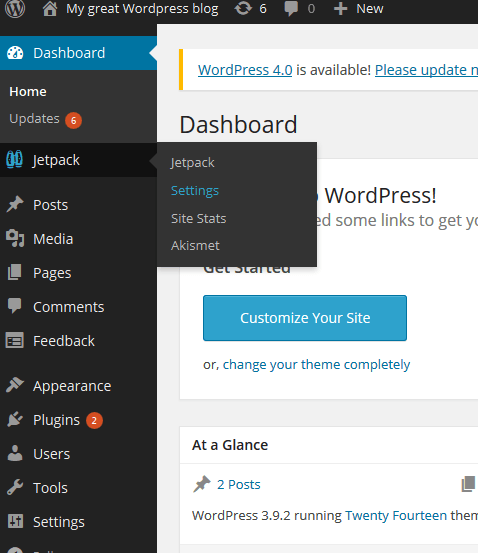
Setting up the Jetpack Sharing Module on your blog is simple. First, go to Jetpack > Settings from the WordPress sidebar.
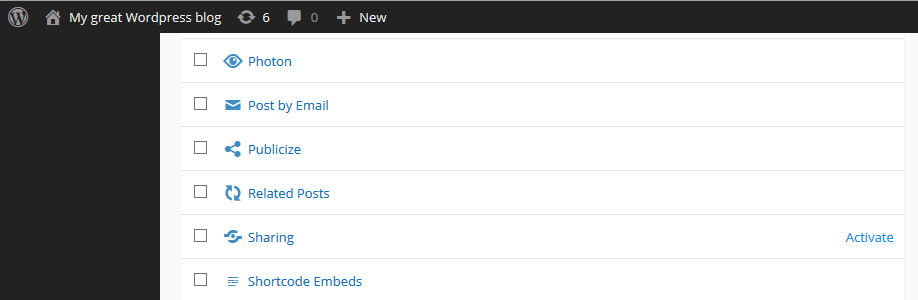
Now scroll to where the Sharing module is listed. Hover your cursor near the module’s name and click Activate.
Now all you need to do is configure the settings for Jetpack Sharing. Stay with me; this will bring big benefit to your blog.
How to Configure the Jetpack Sharing Module
You can access Jetpack’s Sharing module settings via Settings > Sharing. You’ll see this screen:
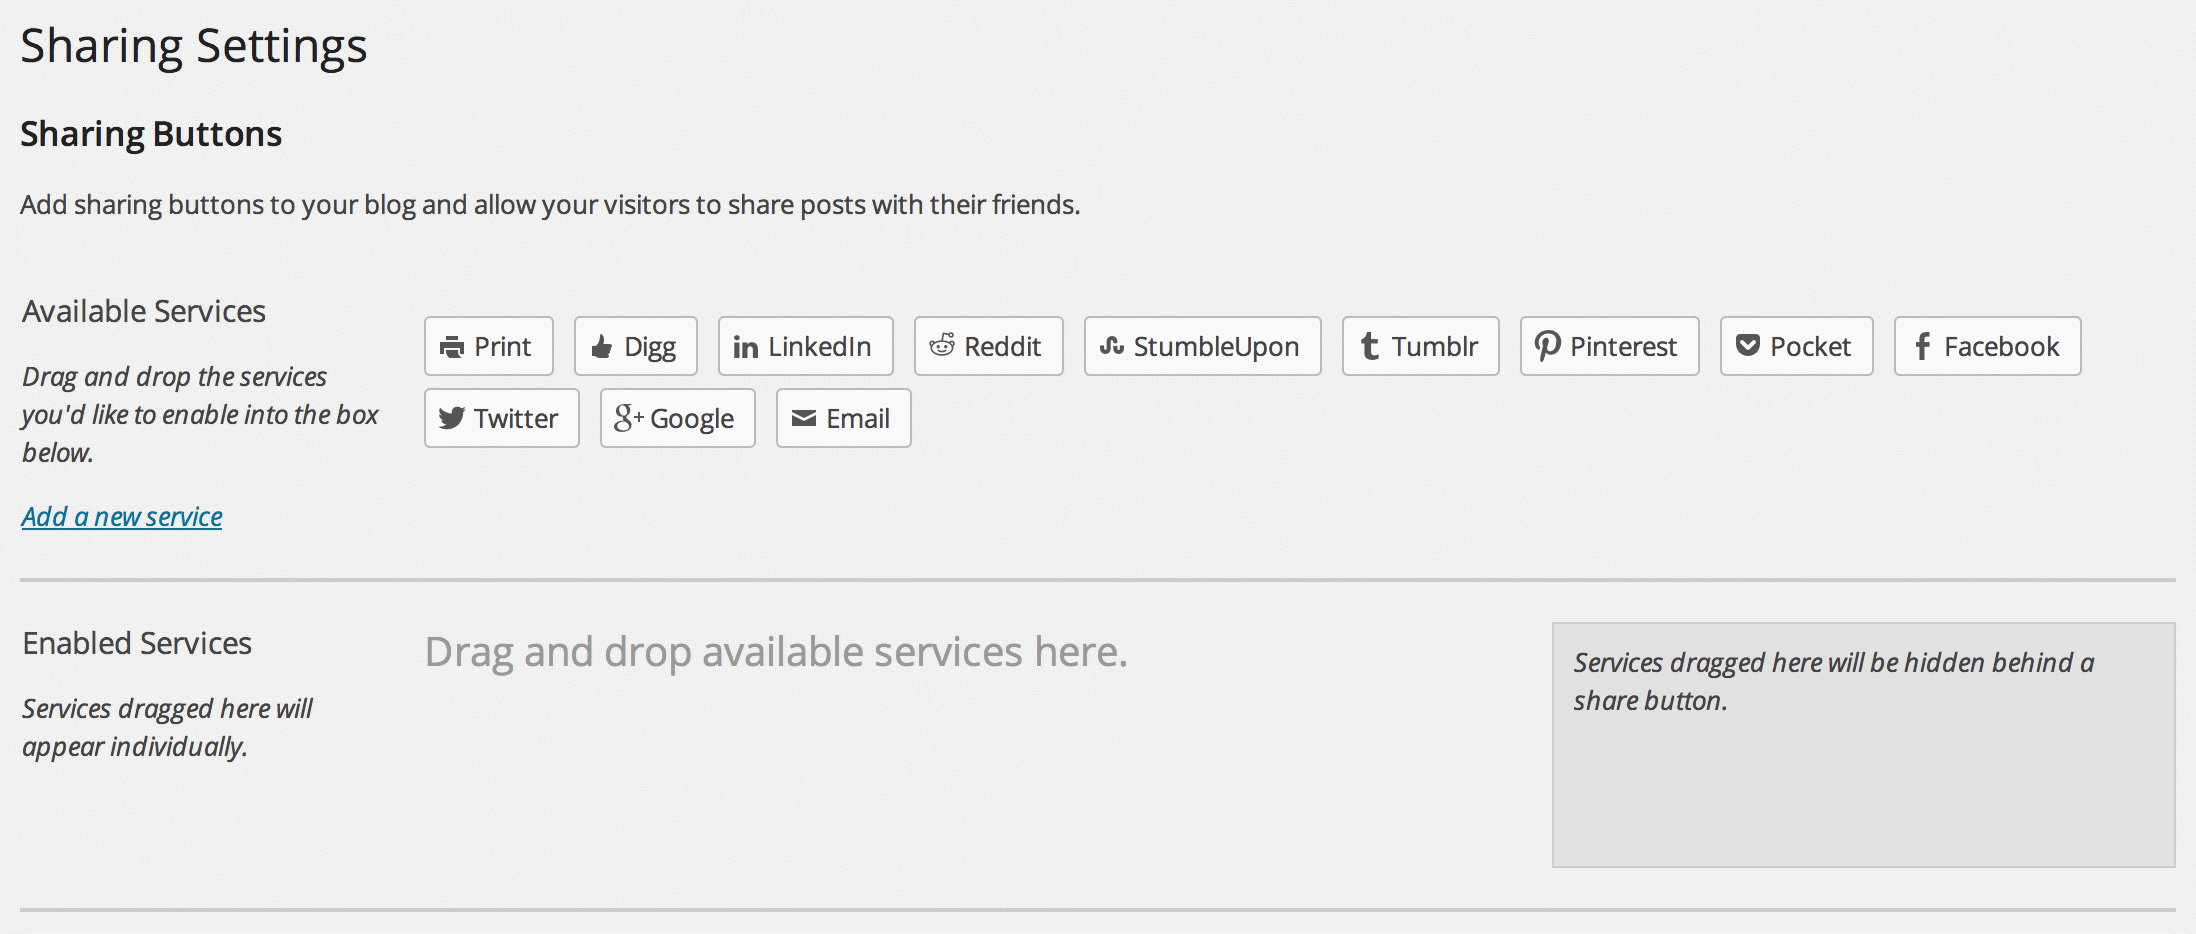
You can choose which sharing buttons to include on your site. At a minimum I recommend that you include Facebook and Twitter. Personally, I would also include Google+ and Email. Beyond that, Pinterest is another popular option, and you might choose to add others due to their particular importance to your niche.
To add a sharing button to your site, just simply drag it from the Available Services section into the Enabled Services section:
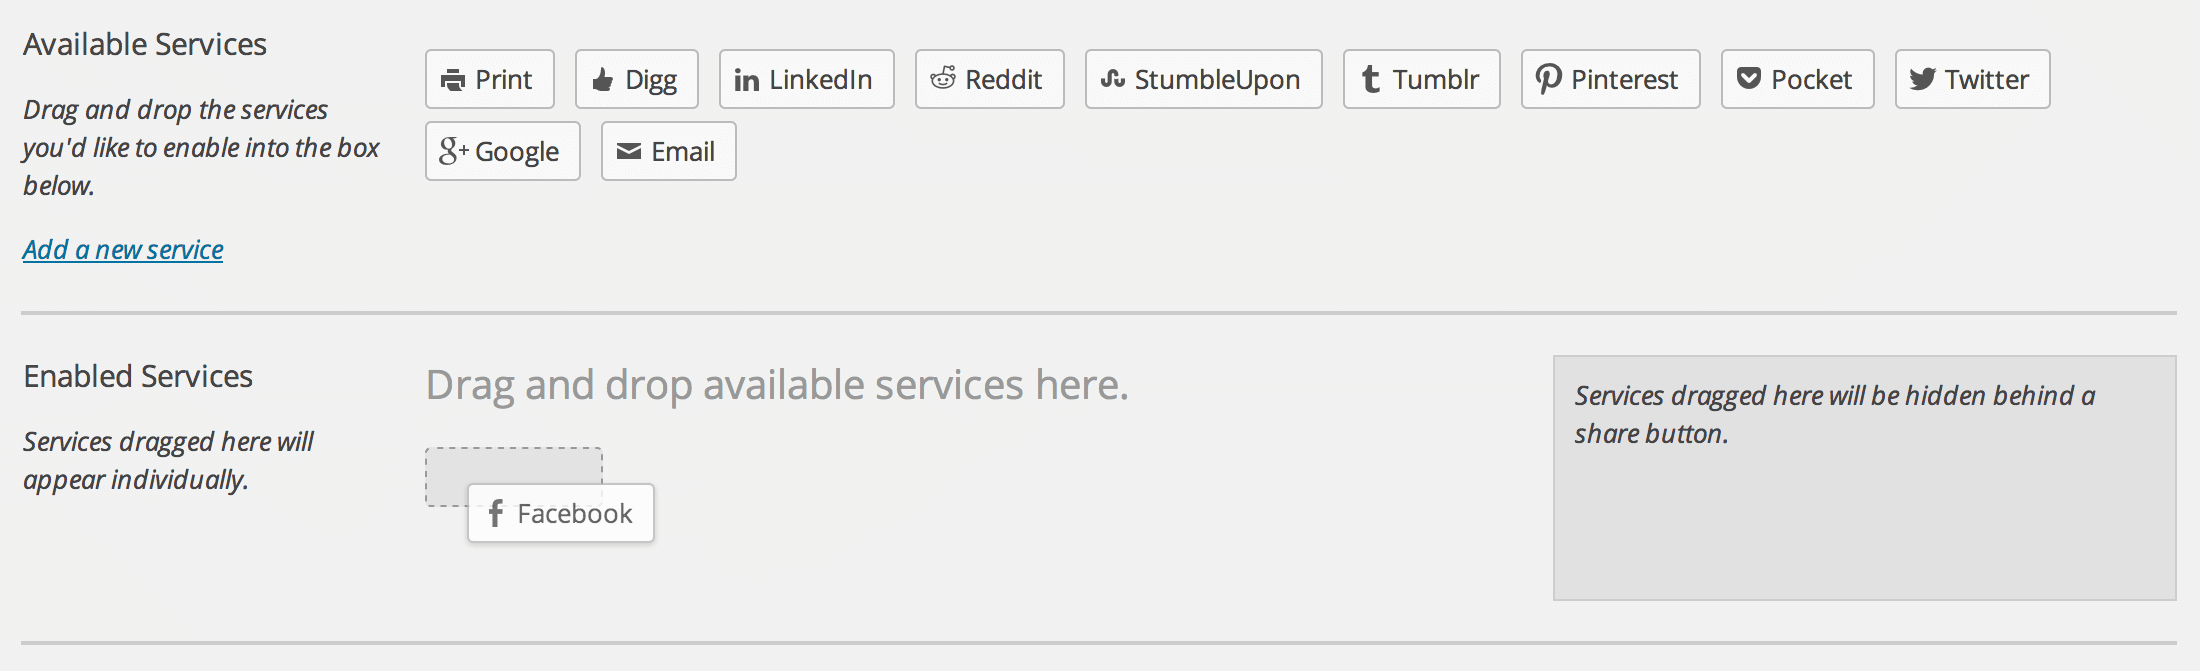
Repeat the process for your chosen sharing buttons. You should end up with a collection that looks something like this:

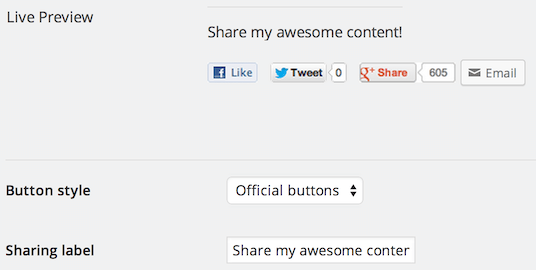
You’ll also see a Live Preview below Enabled Services, which shows exactly how the sharing buttons (and accompanying text) will appear on your site:

Once you’re happy with the sharing buttons you’ve selected, you can configure the other options.
Button style, as you would expect, gives you a few different styling options for your sharing buttons. I personally prefer the default style, but if you’re looking for something more colorful you should take a look at Icon only…
![]()
…or Official buttons:

You can change the Sharing label, perhaps to something that’s more suitable to the style of your blog:
I advise that you set Open links in to New window; that way, people who share your content won’t be taken off your site.
It’s up to you to decide what pages to Show buttons on, but Posts is the most important spot (and in fact the only box I would check).
If you have a Twitter handle, add it to the Twitter Site Tag field so that it is included in tweets that people send out via the Twitter sharing button.
Once you’re done, click Save Changes. If you head over to your homepage and click onto the sample blog post we created in Part 1 of the course, you’ll see that there are now sharing buttons at the bottom: